

Q: How many cyclists does it take to change a tire?
A: I don’t know, but what I do know is that I would never ride that (specific) tire because the sidewall isn’t supple enough, the tread pattern is all wrong, it is way too heavy, it doesn’t come in a 650 x 47, it is sluggish on pavement and they are completely overpriced.
Few topics prompt such unbridled opinioneering as rubber among cyclists, particularly among the adventure set. ‘Which tires should I use?’ is like walking into a record store and announcing ‘I like music, which record should I buy?’. Strong opinions are everywhere and it is often tricky to separate the fact from the fiction. This overview is our attempt to (hopefully) illuminate some of the murky corners of the tire conversation and provide some good information and a few tricks and tips we’ve learned along the way.
700c vs. 650b vs. 29er vs. 27.5
Why is everything different and confusing and weird? The reality is actually pretty straightforward. Road cycling measures metrically (700mm circumference vs. 650mm) while the mountain bike world communicates via inch-speak (29” vs. 27.5”). Which is why you will see models that read 47c whereas an identical tire might be labeled 1.8” depending on how it is being marketed. Of course it gets a tad foggy in the ‘groad’ crossover nexus, effectively a hybrid of both worlds. So to be clear: 700c is the same thing as a 29er in the same way that 650b is the same thing as 27.5.
Got it? Good. Moving on.
700c
The 700c format is favored on road, cross and racing bikes because it is generally perceived to roll faster. Due to the larger diameter, they tend to want to go in a straight line quickly. 700c will have more inertia, so tend to suck up the small bumpy chatter and keep rolling. 700c will shine in faster, tamer ‘roadie gravel’. Inversely it’s not going to do as well in tight, technical or excessively rowdy conditions where quick, snappy cornering is required. 700c will also raise your center of gravity, making steep technical trail descending feel awkward and top-heavy. Another consideration is that due to the larger diameter eating into your precious clearance, 700c wheelsets require narrower, lower-volume tires, the max on many current ‘gravel’ framesets being around 700x45. In a nutshell: on drop-bar bikes 700c is better for faster road-oriented riding, not as good in mountain bike terrain.
650b
Popularized by the randonneuring set, 650b has several distinct advantages, the most obvious being increased tire clearance. You can simply run fatter, cushier tires because the overall wheel size is smaller. At the risk of paraphrasing Jan Heine, higher-volume tires will have a larger ground-contact footprint and can be run at lower pressures, thus increasing traction and creating a more plush and stable ride. 650 also has a lower center of gravity so will tend to feel more grounded in difficult terrain. 650 will also have a snappier ridefeel. Cornering will be tighter, singletrack will feel more playful with increased agility through the rough stuff, rocks, roots, ruts and such. In addition to a cushier ride, 650b is also better for running fenders. Again, the smaller wheel size simply leaves more room. More room = more options. Disc brakes have been a boon to the 650b world because with rim brakes, tire size was limited by brake caliper reach and width, requiring the use of cumbersome long-reach brake calipers or cantilevers. The verdict: 650b tends to be better off-road. It is generally more versatile, more stable and plays well in the rough stuff.
29er vs. 27.5
29er is 700c in mountain-speak, as 27.5 is 650 in trail-dialect or gnarlance. The diameter measures the same but MTB rims are typically wider to accommodate bigger rubber. We won’t delve too deeply into the MTB-specific breakdown of 29 vs 27.5 but to say that 29er tends to be the preferred format for bigger bikes rolling faster over bigger stuff while 27.5 is generally considered to be more ‘playful’ and ‘fun’. Lotta ‘air quotes’ here because I don’t mountain bike as much as I should and thus cannot speak as authoritatively as I would like on the subject.
Supple Is As Supple Does
You hear a lot about ‘supple’ tires these days. I prefer ‘svelte’…maybe ‘lithe’, but the term refers to a plush, luxuriant and compliant ridefeel with plenty of traction and flessibilità. It will be affected by the intersection of TPI, casing compound, sidewall composition, and most importantly, tire pressure or PSI.
Much of what contributes to a tire’s souplesse is the soft, grippy premium rubber used by higher-end manufacturers. This grade of soft, lightweight rubber will roll faster with lower resistance and much better traction and handling, making them optimal for race tires. The downside is of course, that they wear out much faster. So finding a good balance of performance and durability is key.

TPI: without getting too far off in the weeds, we can think of TPI (threads per inch) as threadcount. In oversimplified terms, the higher the threadcount, the lighter the weight and more supple and grippy the character of the ride. Generally speaking. It’s like sheets. Who doesn’t like grippy sheets? In a nutshell: low TPI (60) = harder, more durable, longer-lasting and heavier. High TPI (120+) = softer, grippier, lighter and will wear faster.
TPI Hot Tip: manufacturers claiming upwards of 320-330 TPI may be using ‘creative’ tabulation; essentially bundling threadcounts of multiple individual layers to arrive at ‘ultra-premium’ sounding numbers. There will not be any discernible difference above 120 TPI.
Casing/compound: most manufacturers will offer the same tires in a range of casing options, typically from soft, lightweight ‘race’ compounds up to beefier ‘endurance’ grade. Hardness or durometer is only one of several intersecting properties that will affect performance and durability of a tire. For example, softer, more flexible compounds will roll faster with maximum traction but will wear out quicker, while harder casings will lack the nuanced ride but last longer. Furthermore, tread compound is only one angle on the tire’s equation. Chemical composition, tread pattern and casing design are all factors affecting performance, lifespan and overall ridefeel. It is definitely worth researching and reading reviews of the various casing options before committing to a set of tires as it can sometimes mean the difference between a premium experience or riding on a frosty garden hose.
Oftentimes between specific casing varieties, the external rubber will generally be the same, the key differentiation between ‘race’ or ‘endurance’ lines being the latter may have additional nylon or kevlar protective layers sandwiched inside. The additional layers will generally create a slightly harder, heavier but ultimately more durable and puncture-resistant tire.
Casing Hot Tip: if running the same tires front and rear, try the lighter, more supple casing upfront for increased traction and the sturdier in the rear, which tends to take more of a beating in the rough stuff.
Ultralight Heads-up: certain ultralight casings may be have sidewalls too thin to safely run tubeless though they may claim to be compatible. Many folks have found the sealant tends to seep through the porous sidewall in the Rene Herse ‘Extra-Light’ casings. Supple riding does have its limits and as such we recommend running tubes w/ RH’s ultralight grade slicks.
Sidewall: tanwall vs. black? Thick vs. thin? Supple vs. durable? Which is better vs. which is not better? We will certainly concede that tanwalls are very popular right now and for good reason. They delineate tread from rim, visually punctuating your fleshy rounders with eleganza classica! But do they affect performance or feel one way or another?
In certain cases, the difference will be on the molecular level, silica vs. carbon-based compounds, other times it is an issue of single vs. double ply vs. overall sidewall thickness vs. threadcount. Again, it is an equation of intersecting factors. Each manufacturer will approach things a bit differently, but broadly speaking, sidewall color will not directly affect performance.
PSI: here’s where things get personal. Everyone seems to have a differing opinion on proper PSI. Some like ‘em hard. Some like ‘em soft. The perfect sweet spot can be a moving target depending on terrain, climbing versus descending, paved versus unpaved, oftentimes within the same ride. Setting up tubeless has drastically changed the range of riding pressures possible. Tubes requires a minimum pressure-threshold to keep from pinch-flatting, most of which are too high to be optimal off-road. Thankfully we live in the future and all of that goes away in tubeless-world. We can thank mountain bike engineers for this stream of trickle-down technology. When it comes to tire pressure, there are no right answers, only guidelines that generally consider tire volume, rider weight and of course, personal preference. Enve has compiled this helpful matrix of recommended pressures, broken out by discipline and tire specs. I will personally attest, having recently adopted the Enve-recommended pressure guidelines, my bikes just handle and feel better. That said, there is always a bit of wiggle-room as it relates to harder/sturdier vs. softer/more-supple tires. Play around with it. Experiment and tinker with different pressures. See what feels best under different conditions. There is no right or wrong answer.
Tire Pressure Hot Tip #1: try running slightly higher pressures in the rear and 5 - 7 psi less up front for slightly cushier handling.
Tire Pressure Hot Tip #2: try keeping a pressure log. Sometimes rides will start with too much pressure. Did you let some out over the course of a ride and end up in the sweet spot? Write it down. This will help dial in your Perfect Personalized PSI (PPP).
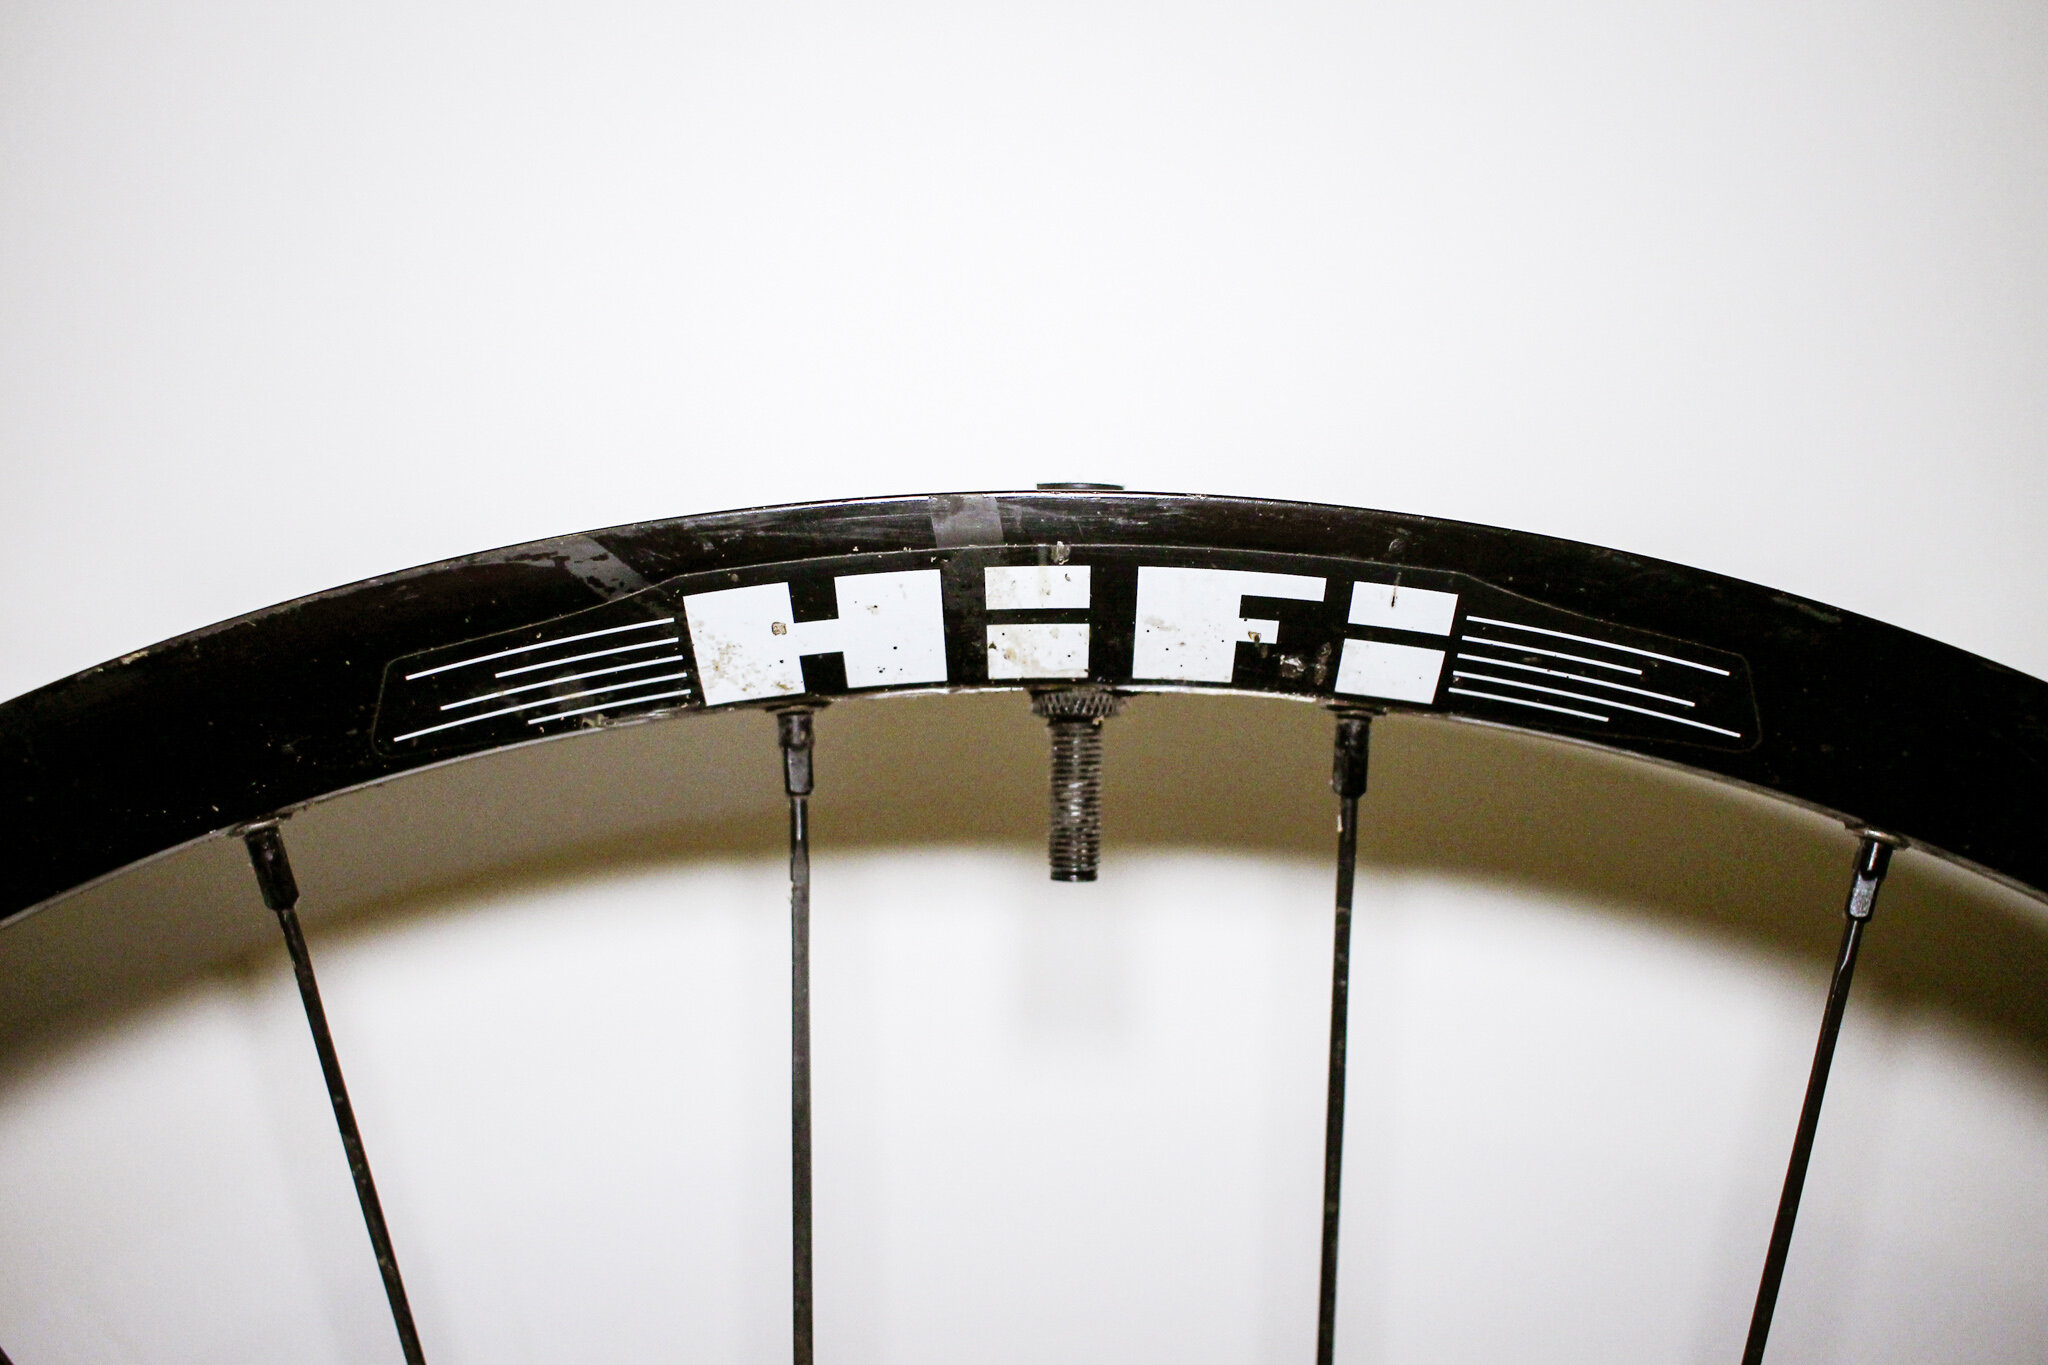
Internal Rim Width: perhaps a bit under-recognized is the degree to which internal rim width will affect tire size, shape and consequently ridefeel. Internal width is measured horizontally across the inside of the rim channel. As they relate to ‘gravel tires’, narrower road-oriented rims (17mm-20mm) can tend to downsize tires a bit, the narrower channel creating more of a rounded, O-shaped profile that will consequently have less vertical sidewall support. Mid-range rims (24mm-26mm) will tend to run tires much truer to size, which is to say your 44c will be more likely to actually measure out to 44. Mid-range rims will generally be the most versatile, supporting narrow road tires as well as your fatty dirt-gruzzlers.
Rim widths have been trending much wider lately under the idea that wider is always better. A ‘wide’ profile (30mm) will have the effect of plumping tires slightly larger and stretching them out a bit. One can see the obvious benefits in terms of ridefeel, traction and cornering, particularly off-road: a wider, more stable footprint using less actual tire - sounds good, right? There are however, a few drawbacks to this approach. For starters, wider rims are heavier. Does this negate the weight savings of stretching those smaller tires? Possibly in some cases. Another limitation will be frame and fork clearance. 30mm rims can easily plump a 2.1” out to 2.25” which is problematic if your bike only goes up to 2.1” or if you are wanting to run fenders. Additionally 30mm internal width may actually be too wide to safely run some narrower tires, so it is worth considering how this will impact your tire choices and clearance before committing to a wheelset.
tread pattern
Knobbies: ideal for dirt, mud, wet weather, singletrack, chunky rocks, mixed-terrain confidence, peace of mind and overall well-being in the rough stuff. The bigger the knobs, the greater your traction in the dirt. Look at mountain bikes. They get it. Not so good on pavement, cornering in wet leaves or keeping up with your friends on slicks. Note that most of them will tend to have smaller, faster-rolling centerline textures with larger, toothier, angled shoulder knobs for more robust cornering traction. Wider spacing on the knobs will shed mud while a tighter, more concentrated pattern is better suited to dry conditions.


L to R: Schwalbe Thunderburt 650 x 2.1”, Maxxis Rekon+ 27.5 x 2.8”, WTB Resolute 650 x 42, WTB Riddler 650 x 2.25”
File Tread: optimized for light gravel duty and transitioning between pavement and not-pavement. File treads will be the most versatile tire style available, the bulk of ‘gravel’ tires generally sitting somewhere within this category. Variations include fast-rolling centerline strips and/or toothy cornering knobs. Rounded profiles will generally roll faster with smoother cornering while more squared-off shapes tend to be more stable. Pick your poison.


L to R: Teravail Cannonball 650 x 47, Simworks Homage 700 x 44, Specialized Trigger Pro 700 x 38, Schwalbe G1 700 x 38
Slicks: ideal for riding-to-the-ride when ratios lean heavily paved. Slicks do best in dry weather and can be surprisingly agile on smooth, dry singletrack. Less than ideal when things get muddy and rough, but are generally more capable than you’d expect. The trademark vertically-ribbed center lines of the Rene Herse/Compass tires provide added traction and a grippier roadfeel than a true slick. Casings will range from sticky, delicate extralights to harder, darker, more puncture-resistant ‘endurance’ compounds.


L to R: Rene Herse Switchback Hill 650 x 48, Panaracer Pasela 700 x 38, P.Racer Gravel King 650 x 44, Compass Snoqualmie Pass 700 x 44
Tread Pattern Hot Tip: try a bigger, toothier tire up front and a smoother, smaller-volume tire in the rear. This will give you more cushion and traction where needed but keep you rolling efficiently on the tarmac.
tubeless trials & tribulations

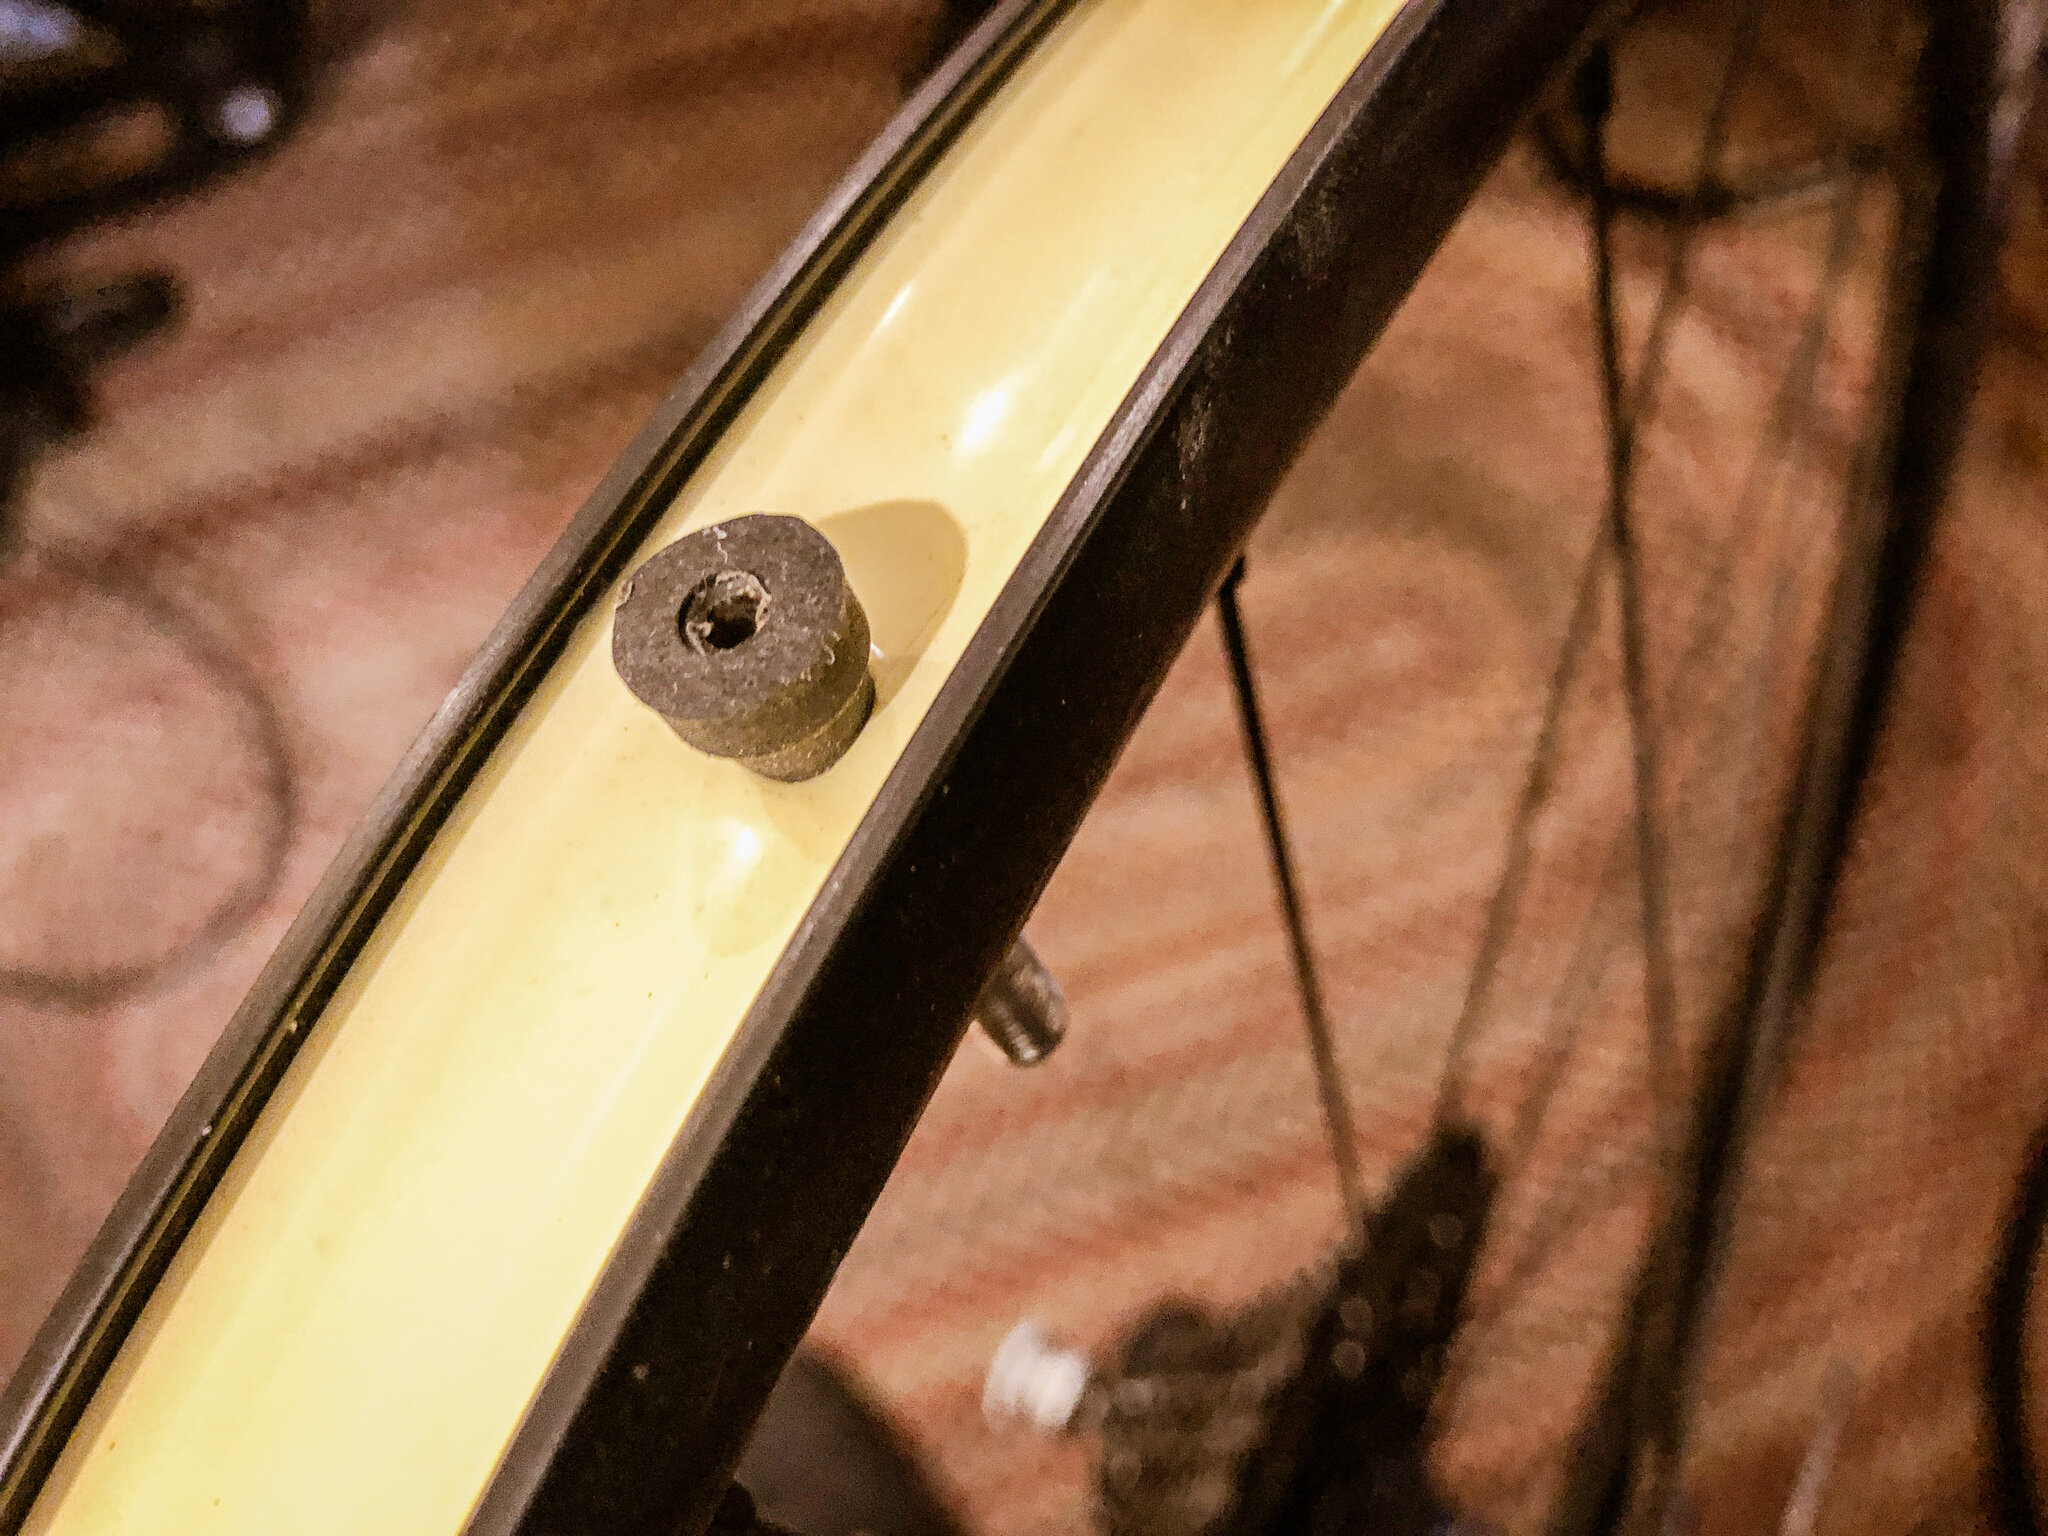
Is there a single technological advancement with more impact on off-road cycling than the tubeless tire? Okay, maybe the aluminum beer can or the fannypack, but the tubeless tire isn’t far behind. While I won’t claim that running tubeless will completely eliminate the flat tire from your ride-life, if properly executed and maintained, flats will be much fewer and further between. A catastrophic puncture or sidewall gash is still a distinct possibility, but gone will be most of the ‘nuisance flats’ caused by minor road debris. Oh, and pinch flats don’t exist with tubeless, so there’s that. And if you weren’t already convinced, consider figure A.47. This was discovered during a routine seasonal tire change and had been ridden for months, presumably in this condition, without incident. Sold, right?
So how does it all work?
In lieu of tubes, tubeless setups utilize an airtight seal between tire and rim augmented by a liquid sealant which forms a gummy airtight skin inside the tire, keeping the air in place which in turn, keeps the tire bead firmly seated, which in turn keeps the smile on your face. The idea is that when small punctures occur in the tread, the gluelike sealant is centrifugally forced into the puncture, self-sealing any gaps or holes within reasonable size. This will typically be something the size of say a nail, staple, hypodermic needle, thorn or a bit of glass. Under ideal conditions, the sealant will be passively at work, self-sealing these small punctures as you ride along blissfully unaware.
You’ll need a few things
Tubeless-compatible tires: just about all modern gravel, allroad and off-road tires are going to be tubeless-compatible these days, but there are still some odd holdouts particularly in the narrower sizes. Be sure to check before committing. Most will have some sort of ‘TC’ or ‘TR’ nomenclature displayed on the sidewall.
Tubeless-compatible wheels: again, be sure to check. Most wheelsets these days will be compatible. Some newer tubeless wheelsets are designed with a ‘solid’ interior…ie no visible spoke nipple holes. These will not require taping and of course no tape = less possibility of air leakage. The downside of this design will be that spoke service is going to be more difficult. Tape is good. Embrace the tape.
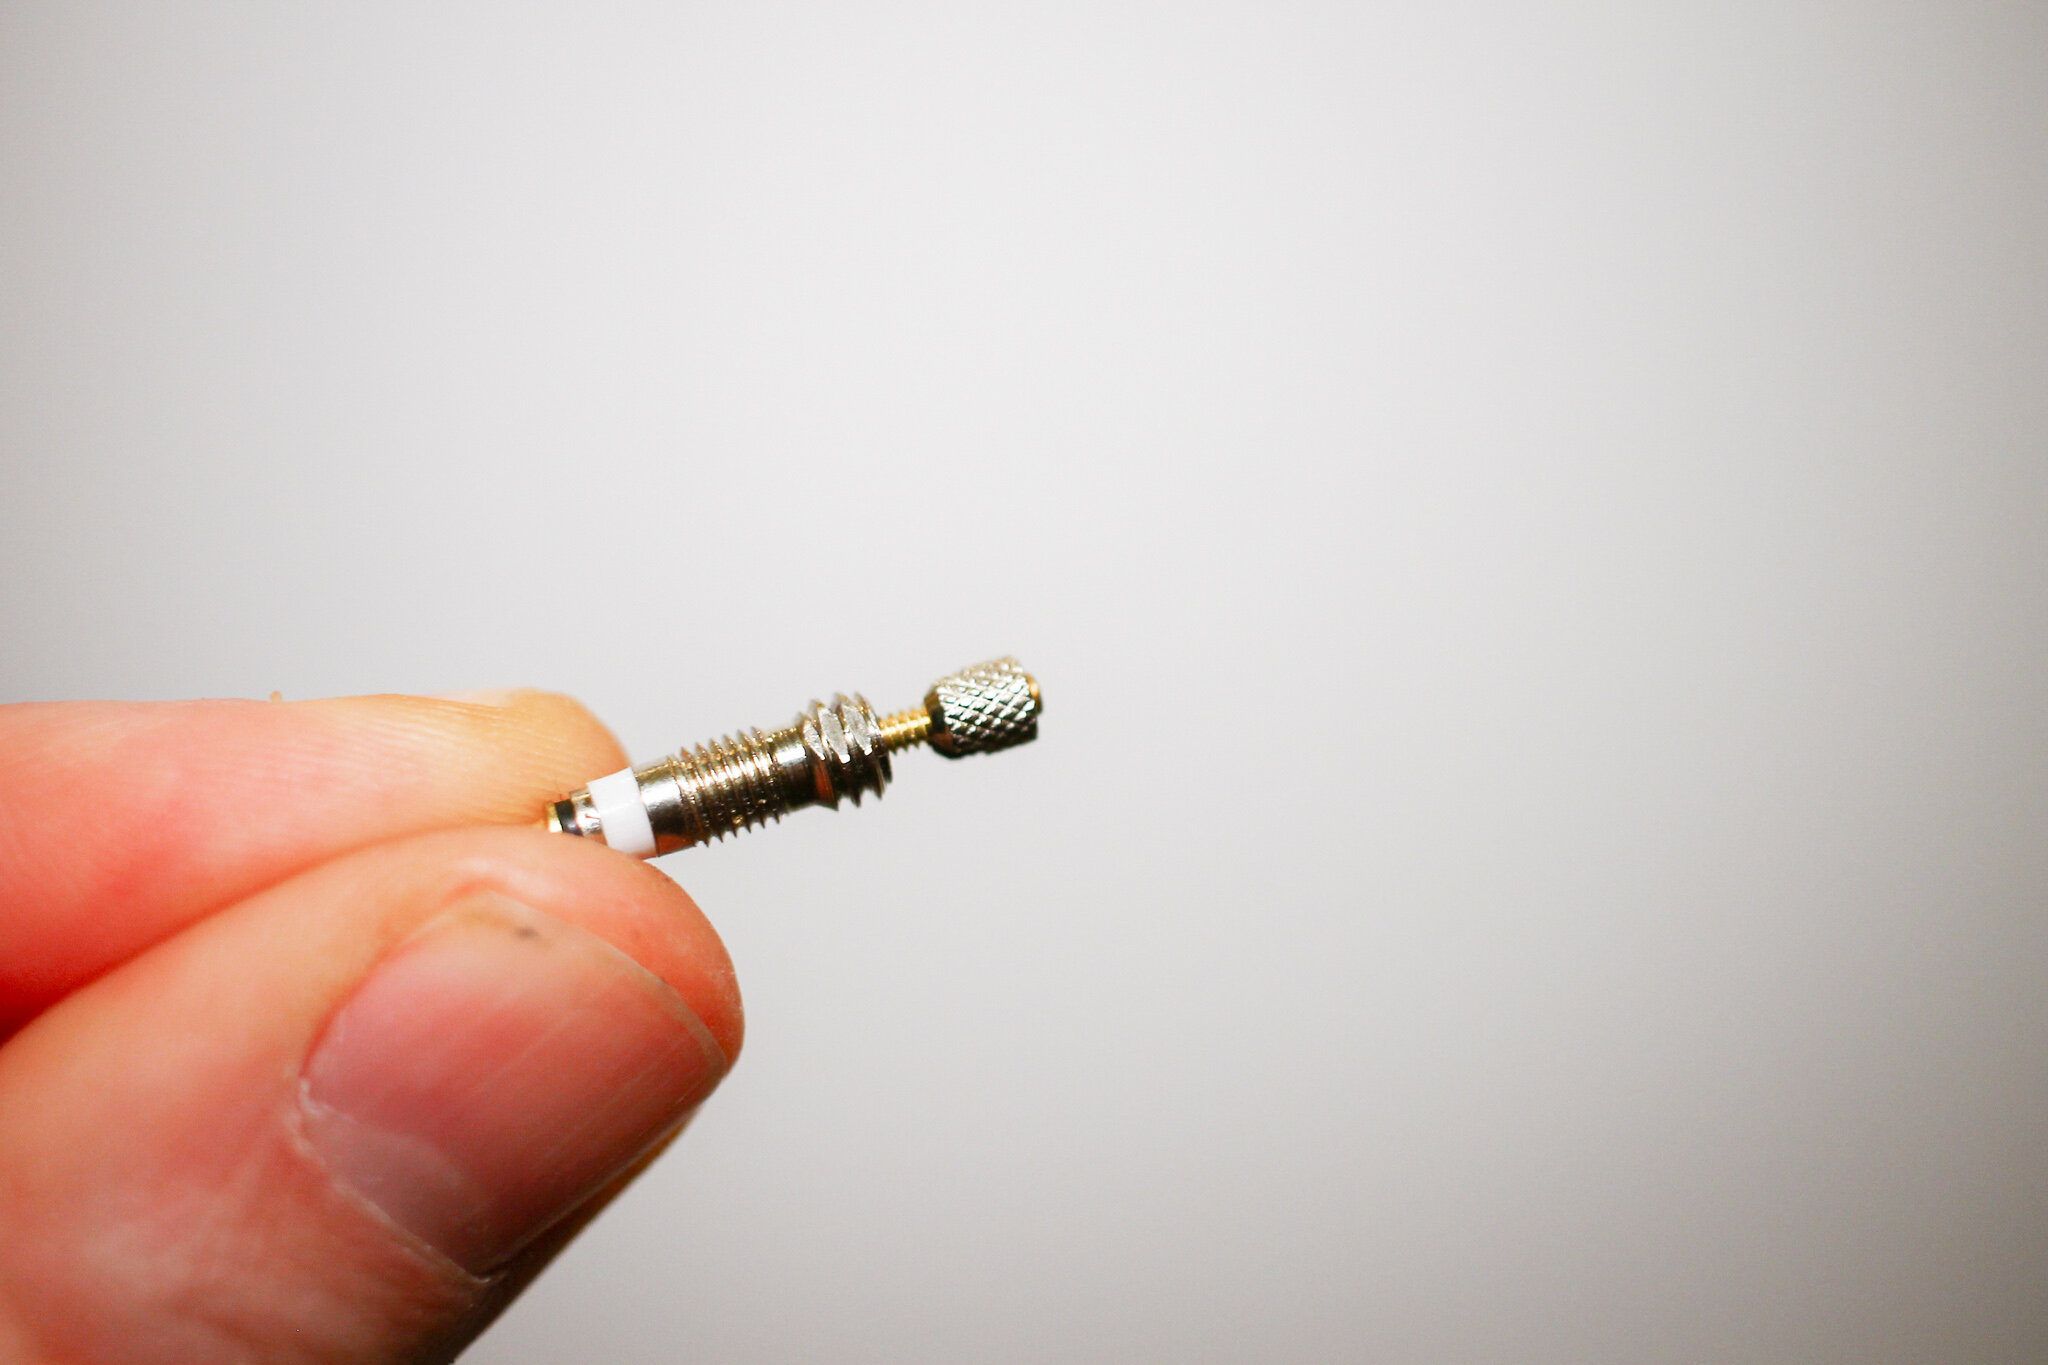
Tubeless valve stem: go slightly longer than you think you’ll need. Depends on rim-depth, of course, but longer valves give pump nozzles more to grab onto than shorties. Some claim to be ‘no-clog’. Anything will clog over time. Changing out the valve cores every so often and cleaning regularly w/ a small pipe-cleaner or pokey nub cut from a wire coathanger will go a long way. Additionally, valves cut from old tubes can also work, provided they have removable cores and you leave enough peripheral tube to form an airtight seal.
*Valve Stem Heads-Up: be sure the valves on your spare tubes are of equal length to your tubeless valves to avoid coming up short whilst tubing a flat. Stock spare tubes with stems ‘slightly longer than you think you’ll need’ as well. Your future-self will thank your current self for attending to the details.
Tubeless rim tape: get a few rolls, you’ll be glad you did. I prefer the yellow Stan’s stuff. Some people swear by Gorilla Tape, but I have my doubts. Be sure your tape width matches your internal rim width. Too wide and it will bunch up. Too narrow and it will leave a gap and not seal properly, leading to vexation and despair. I swear by multiple layers of tape. Of course, it will depend on your wheel/tire fit, but I will typically wrap up to three layers of tape to build a nice tight seal. If the tire goes onto the rim too easily, chances are it’s not going to seat and you will need to add another layer. *See ‘vexation and despair’.
Sealant: I highly recommend sticking with the classic Orange Seal or Stan’s sealants. Avoid clumpy, goopy, gelatinous or gimmicky stuff. The recommendation is about 3 oz per tire for mid-size tires like 40-45c. The higher volume the tire, the more sealant you’ll need. I tend to err on the side of adding more sealant rather than less, say up to 4-5 oz, particularly when setting up new tires. Fresh rubber is thirsty and will absorb quite a bit. You will want to make sure the entire inside surface of the tire is coated with plenty to spare. One further plug for Orange Seal: because it is more of a liquid, you won’t end up with ‘floaters’ or ‘Stanimals’ of congealed sealant bobbing around inside your tires.
*You may ask ‘What about adding glitter to my sealant?’. Consider the fact that glitter is a microplastic pollutant. Let’s not go spraying microplastic pollutants around the woods. Panaracer Seal Smart uses ground walnut shells as a coagulant, so that’s an actual thing. I’ve heard tell of cat hair but can’t really confirm the rumor.
High-pressure pump: the key here is to have something that will deliver enough of an air blast to get your tires seated in one shot. This usually means something that will go up to 160 psi, which is fairly standard on most of the tubeless-marketed chamber-pumps. There are several approaches that will work. The easiest will be the charger-style floor pumps. The cheapest will be a standalone pressure chamber that can be filled from a standard floor pump. The most elaborate will be a shop-style air compressor. Keep in mind, the lower-powered basketball-inflator style compressors won’t be up to the task.
*If using a high-capacity compressor, be sure to quickly reduce tire pressure below 40psi once seated. Allowing a tire to sit with extremely high pressures after seating can stretch the casing, causing micro-cracks in the membrane. This can sometimes allow sealant to weep out through the cracks and cannot be repaired.
Valve-core remover: when in doubt, take it out. Sometimes you get lucky and can get tires seated with the valve core in, but you will get a much more direct, high-volume airflow with the core removed.
Sealant applicator w/ feeding tube: not necessary for every setup, but you’ll want a small 4oz bottle w/ flexible tube for routine maintenance sealant top-off so as not to have to crack open your tires each time. Also helps keep track of sealant volume.
Syringe injector: sounds dangerous right? Again, not compulsory for every tubeless operation, but extremely helpful in transferring sealant from your old tires to your fancy new ones.
the method: best practices
The setup can be tricky and may take a bit of trial and error. You’ll want to take your time. Slow down. Be patient. Methodical. Crack open a cold one. Fix yourself a sandwich. Your tires will sense if you’re in a hurry and will refuse to cooperate. They know. You’ll want to start by thoroughly cleaning and drying your wheel. Particularly the interior and channel of the rim. Remove any residue, cloth rim stripping, old tape and wipe down with alcohol to remove any oils or residues. While you are doing this it is usually a good idea to get your tires out of the package and let them stretch out for a bit, finding their natural shape. If it is warm outside, let them sit in the sun. It will soften the rubber, making them easier to seat. Some folks like warm soapy water. Some folks use a hair-dryer to the same end. It’s all about priming that bead-mojo. Side A of Workingmans Dead is rumored to be effective at coaxing things into place.


Once your tires are napping in the sun and your wheels are clean, break out the rim tape. Locate the valve stem hole and begin your first tape layer about an inch to one side of the hole, starting by stretching the tape over the opening. You are going to want to keep a healthy tension on the tape as you line the outer circumference of the rim. Remember, this needs to create an airtight seal. I like to use a stretch-and-smooth method, doing about 8” or so at a time, tightly pulling and stretching the tape meticulously into place, then following with a clean-ish shop rag with my other hand to press the tape firmly into position, smoothing out any uneven bits or air bubbles. I will typically use a lot of tension to make this first, base layer really snug and tight, evenly across the entire rim channel, then keep going around until I’ve passed over the valve stem hole for the fourth time (three layers). Trim the tape off about an inch or two beyond the hole, opposite your starting point.


You will now want to take either a nail, stabby knife, ice-pick or very small diameter phillips-head screwdriver (smaller than the diameter of your valve stem) and poke a small hole from the exterior through the tape into the valve-stem hole. It helps to heat your poking implement with a lighter or stove burner for a moment. Keep the hole small and clean. This is going to help form your airtight seal around the base of the valve stem. Press your valve stem through the hole and firmly into place with the rubber stopper nice and tight against the tape. Cinch down the threaded washer on the interior of the rim to keep everything just so.


*One note here. You do not want to over-tighten the valve washer beyond what you can unscrew w/ your hand. If you happen to flat out in a wild wood, you will need to be able to get your valve stem out to run a tube. Remember: snug…but not overly tight.
You are now ready to fit your tire onto the rim. Keep in mind that tubeless tires should take a moderate amount of effort to get onto the rim. If they go on too easily, the fit may be too loose to seat. Be sure to check the directional arrows. Nothing vexes quite like wrestling a tire onto the rim only to realize it is backward. Line up the tire logos w/ the valve. It’s just the right thing to do. With more supple tires, it is sometimes recommended to pinch and pull upward on the tire to ease the bead into optimal position. Try this all around the entire circumference to create an internal suction seal. Depending on the particulars of the fit, the opposite may be true. If the bead is tending to pull into the center channel, try pushing down on the tire all the way around to force the beads outward toward the edges.


Now here is where folks tend to differ. There is a ‘dry method’ which is the more advisable, and a wet or ‘why would you ever do it that way?’ method. In most cases, it is recommended to seat your tires dry, deflate then add the sealant via the ‘feeding tube’ once the beads are in place. However, if I am familiar with the fit of a particular tire on a particular rim, I’ll throw caution to the wind and add my sealant before seating the tire, because I am reasonably certain it is going to work. If pre-loading the sealant, massage almost all of the tire onto the rim, leaving a small gap on one side through which to add your sealant. With the sealant in place, finish mounting the remainder of the tire so it is fully on the rim then gently rotate the wheel in your hands to coat the inside thoroughly, tipping out to the edges to get the bead. There are some that feel the pre-load can help get things seated, but in many cases it just amounts to a bubbling mess.
When this fails, see ‘dry method’.
Now comes the moment of truth. Make an offering to the tubeless gods, crack a fresh beer and hope for the best. If using a chamber pump, you will want to preload to max pressure, most top out at 160psi. Make sure the valve core is out and affix your pump nozzle. If it doesn’t have a super tight seal without the valve core, which some do not, hold it in place with one hand as you throw the switch on your chamber. If Jupiter is aligned with Mars and you’ve done everything right your tires should swell into shape followed by a series of resounding CRACKS! Your tirebeads will have snapped into place. A bit of weepy bubbling sealant around the rim-tire interface is to be expected via the ‘wet method’. If everything seems to be holding, quickly remove the pump nozzle, using your finger as a stopgap and pop the valve core back in, hopefully before losing too much air. Pump the tire to a sensible firmness, say anywhere from 20-40psi. Now that we have structural integrity, it is customary to methodically slosh the sealant around inside the tires using any number of ritual dances. Shake it. Slosh it. Roll it. Wiggle it. Once the sealant is thoroughly agitated, give the wheel a spin and check to make sure the bead is uniformly seated, there are no lumpy spots or dips and everything is rolling smoothly. There will oftentimes be one or two trouble spots where the bead is stuck just below the horizon. A few additional pumps of pressure and a little hand-wrangling tend to do the trick. Just listen for the telltale CRACK.


Once the beads are in place, and the sidewall line is sitting uniformly above the rim, you are now clear to let the tire deflate. The bead will generally stay put. You can add your sealant through the valve via your small applicator bottle or syringe. Again, the recommendation is about 3-4 oz on a 40-45c tire. More for bigger, less for smaller. Keep in mind that with sealant, it is better to overdo it than underdo it. There are some that thread onto the valve stem, but the clear rubber slip-ons work just fine too. Give it a healthy squeeze, replace the valve core and you’re ready to pump the tires back up with a standard floor pump.


Congratulations! You’re now seated! On a flat, horizontal surface (I like to use the top of an open garbage can or storage crate) rest the freshly-seated wheel for about 10-15 minutes on each side to enstrengthen the seal.
*Make sure not to exceed the recommended pressure for your tires and rims. Many tubeless rims are rated from 40-50 psi. Exceeding the recommendation risks blowing your tire off the rim and nobody wants that.

so it’s not working…hmmm
What’s that…you’ve got a bubbling mess all over your new living room carpet and yet your tires are still flaccid empty sheathes refusing to hold air? Welcome to the process! Let’s try a few different approaches to see if we can’t turn things around. Like I said earlier, it’s really all about just coaxing the bead to seat and the rest will follow.
Hot soapy water: this approach works well when it’s close but just can’t seem to get over the hump. It could be that your tire has a rigid casing or is still cold. You’ll need a mixing bowl w/ a squirt of dish soap and very hot water. Apply with a sponge or paper towel around the sidewall and bead of both sides. Nice and slippery. The heat will soften the rubber and the soap will ideally help it slip right into place. Be careful not to get too much of the water inside the tire. It will dilute the sealant, reducing its capacity to clot. The bubbles will also help identify where air may be leaking.
Add more tape: honestly, if I’m noticing that it’s not even getting close, I will oftentimes cut to the chase and just add another layer or two of tape. Though it requires removing the tire, valve stem, re-pokeyholing and completely cleaning and drying the wheel, it can sometimes be the fastest way to get them seated. Note: this almost always works so if one practices sound sealant-management technique, this can often be quick and painless.
Put a tube in it: no seriously. Put a tube inside just to get it properly seated then delicately remove through one side, leaving the other fully seated. This approach is typically reserved for difficult cases. I will confess that this is my least-favorite approach. I find that all the wrasslin and jasslin to get the tube out runs the risk of unseating everything you just sat, but I will put it out there because it does flex the tire into reasonable shape and get at least one side properly seated and that’s half the battle.
Roll/flex the tire as you’re filling. This can sometimes flex the bead just enough to get it to catch while filling. I have also heard tales of folks hanging their rims when seating, as it can create a more uniform bead position. Might not be necessary most of the time, but sometimes you need all the mojo you can get.
Strap it down: sometimes a naughty tire needs a little encouragement…a bit of tough love to whip it into shape. A set of 3 or 4 Voilé straps around the tire and rim at even intervals can be just the thing to keep the bead in place and minimize gaps for seating.
The Ouroboros: in a pinch it has sometimes been helpful to use a tie-down strap or rope around the centerline circumference (visualize the circular motif of the serpent devouring its own tail, but rather than symbolizing infinity, it is seating your tire) to coax the center of the tread flat all the way round, forcing the beads to the outside. The trick here is to release the strap the instant the beads begin to hold, allowing the tire to expand.
Bishop takes knight: this one is a bit of an outlier but I have seen this technique work with only a standard floor pump. If the rim/tire fit is loose-ish, using a tire lever, pry half the bead of one side up to balance on the shoulder of the rim, thus tightening the seal. You will notice the tire will be stretched into a slightly misshapen countenance to accommodate the extra rim diameter. Now flip the wheel to the other side and do the same thing on the diagonal opposite. It will become increasingly tight as you near the end of the second half. Inspect to make sure everything is sitting just right up on the shoulder and give it a several pumps. The increasing internal pressure should pull the diagonally-opposed beads down into proper position, seating your tire.
Run sealant in your tubes. There is no reason you can’t have it all! If you have an older, non-tubeless compatible wheelset with plenty of life left, there is certainly nothing to stop you from running sealant inside your tubes. You will simply need tubes with removable valve cores, but the process will be the same. Inject the sealant in via the valve and you’re good to go. A couple things here: as with any tubed setup, you will still be vulnerable to pinch flats, but as with standard tubeless, you may find your nuisance flats much fewer and further between. Another consideration is that over time, the cumulative sealant-letting will tend to fuse the tube to the tire, making roadside tube-extraction a bit trickier.
Check the valve stem: improperly seated or loose valve stems are most often the source of air leaks. While the method described above should hopefully sidestep loose-valve syndrome, it may sometimes be necessary to torque down on the nut with a set of mini-pliers. Just don’t forget to bring the aforementioned pliers out riding with you should you need to remove the valve in the field.
Workingman’s Dead: try running Workingman’s Dead, starting from ‘Uncle John’s Band’ all the way through to ‘Casey Jones’, complete with the pauses as Phil Lesh intended it to be heard.
field dressing
So there you are, minding your own business, chugging along when suddenly you feel a slight tingle against your gam-shanks. You think ‘What the…why are my socks wet? Who spilled a mango lassi on my chainstays?’ You may have just sprung a leak. If you are noticing a small pale bubbling in your tread, this is your sealant reminding you that it is hard at work even if you aren’t actively aware. Generally speaking, the spinning action will continue to force the sealant into the hole. For small punctures, it helps to stop and rotate the tire to the 6:00 position (the bottom) to get the maximum amount of sealant where it is needed most. You’ll know soon enough if it is working.
With larger punctures the spray can be quite a gusher. In these cases, one would do well to dismount and rotate the hole to the top of its arc, in the 12:00 position (top). This will prevent you from losing additional sealant. In cases of anything larger than a tiny hole, it is almost always advisable to use a plug rather than rely on sealant alone. Whether you prefer Dynaplug or a ‘bacon strip’ (so called because the hard gummy rubber plugs resemble bacon), a plug is going to fill the hole and give the sealant an ample amount of grippy material to form a seal around. It has been said a poultice of clay, sand or iodized salt applied to the exterior of the wound has been known to suffuse sealing properties and promote clotting. In more difficult cases, a dressing of Super Glue on the exterior either alone or in conjunction with a plug can help hold things together long enough to securely close the hole. For best results be patient. Allow a few minutes for drying before hopping back on. So in a nutshell: if it’s a tiny hole w/ scant bubbling, rotate the tire to the bottom of its arc (6:00 position) for maximum sealant sealage. Inversely, if it’s spraying out through a larger hole, rotate to the top at 12:00, plug and possibly super glue above and around the plug, let dry and you should be on your way.
maintenance
Different sealants will dry out at different rates, but it is generally recommended to check your sealant levels every month or so and top off if needed. Try using a dipstick to check your levels rather than cracking open your tirebead. Orange Seal sells one as part of their tubeless kits but you can easily make one by cutting a bit of length from a wire coathanger. In a dry tire, add the appropriate volume of sealant. With the valve in the 6:00 position and the tire slightly elevated, insert the dipstick to find your mark, then sharpie the line in the appropriate place. This wire tool also doubles as a valve de-clogifier if over time, dried sealant begins to restrict airflow.
Another consideration is that you will want to keep your tires reasonably fresh with tubeless. Threadbare and worn tires tend to be frequent-leakers. While some folks recommend only mounting tubeless on brand new tires, I find as long as your tires are in good condition, with plenty of tread, you can switch between various gently-used tiresets as often as you like. Another approach, particularly if you have several bikes running tubeless is to mark the date of your last sealant refill on each sidewall with a sharpie. Helps with keeping track.

